Raspberry Pi Tables
Fleeting- first attempt
- second attempt, print speed at around 30mm.s-1
- third attempt: increasing retraction to 5mm (instead of 2mm) and cleaning the bed
- fourth attempt: print only the legs, and set nozzle size to 0.4 instead of 0.5 and correct filament diameter (1.75 instead of 3)
- Notes linking here
- Permalink
I bought a rack of raspberry pi
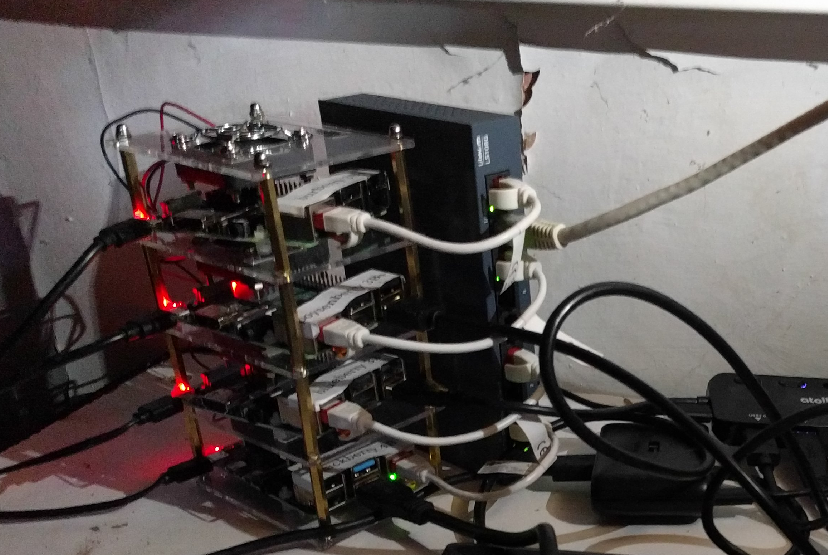
But I realized it was not practical at all. It is hard to get a raspberry pi out of the rack, without disturbing the others.
So I decided to print small tables instead.
Note that I also take advantage of this to play with slic3r.
first attempt
Printing at 180°C.
I stopped it before the end.
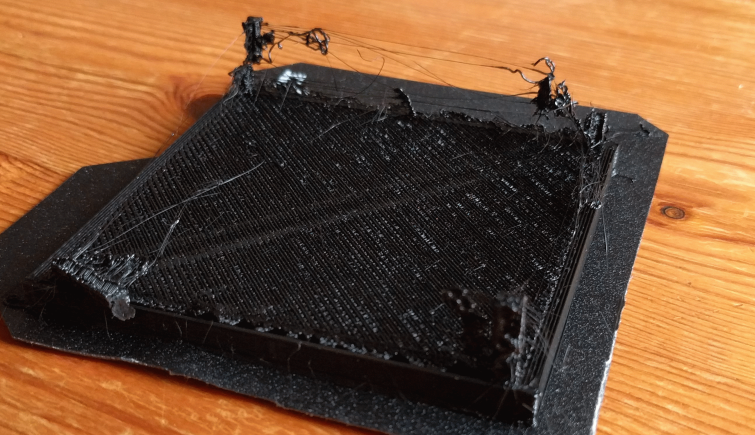
what I learned
The default settings of slic3r print much too fast.
second attempt, print speed at around 30mm.s-1
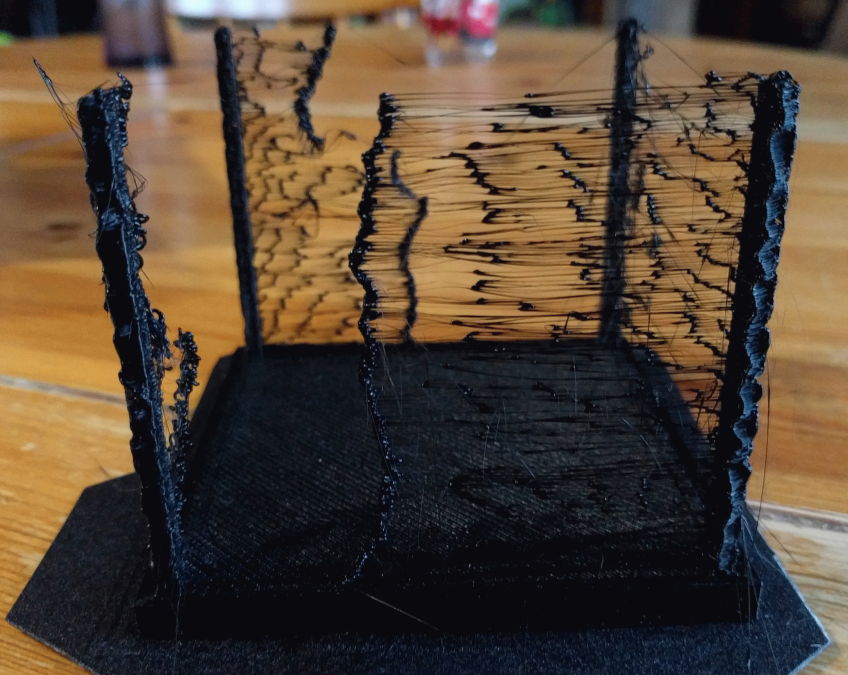
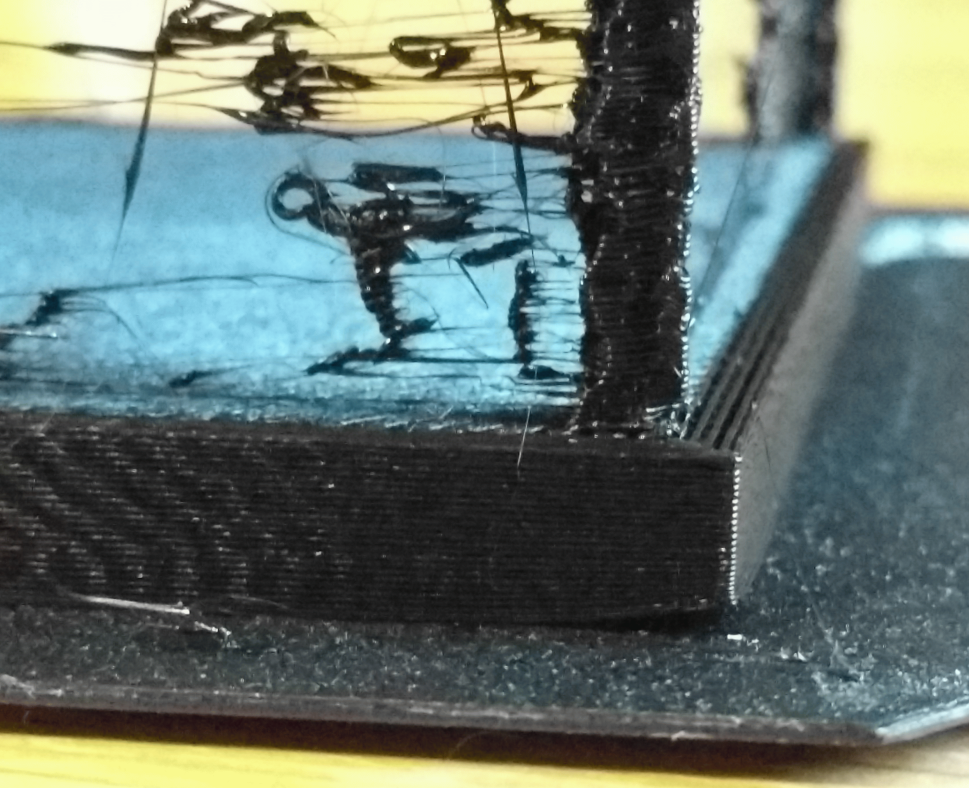
Too much stringing. The temperature is already quite low though.
The filament is oozing and leaves the nozzle before reaching one leg, leaving less matter for the leg.
Also, there is a slight warping.
what I learned
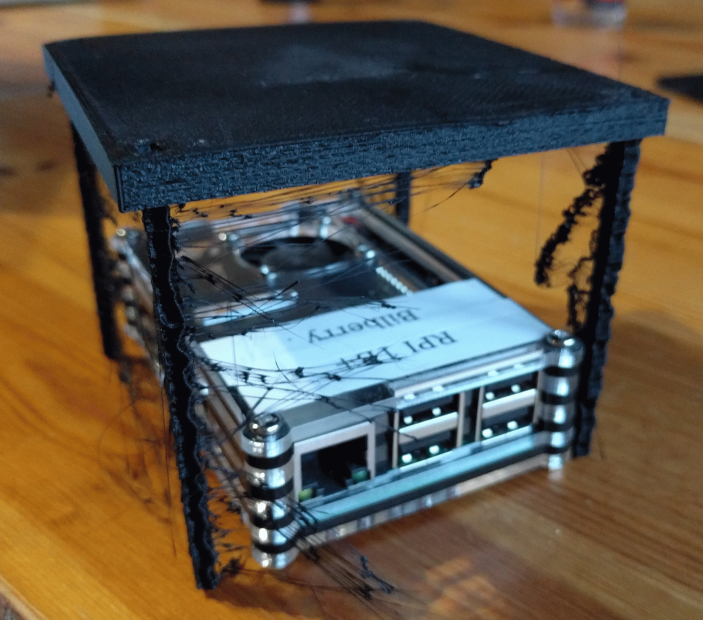
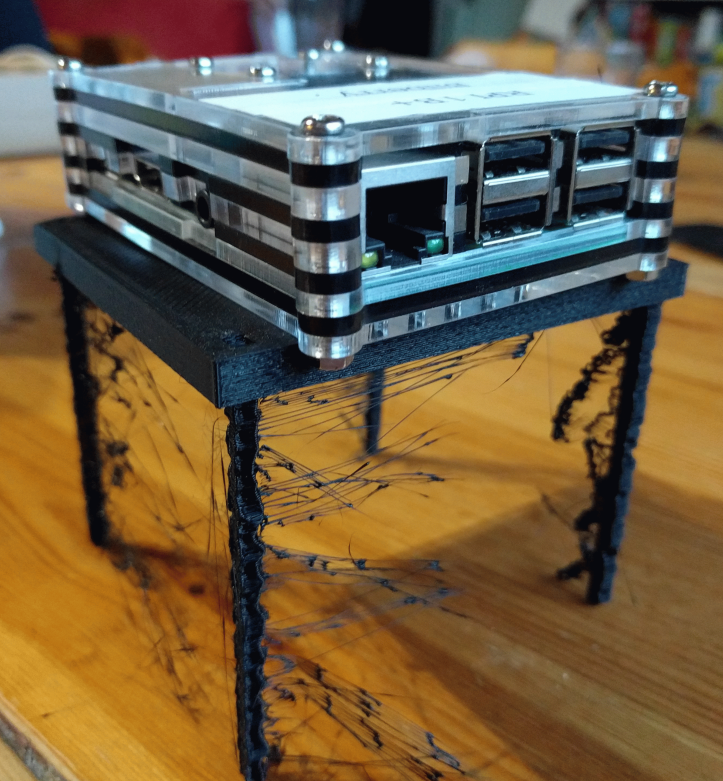
Overall, the size is correct. It is not that big and leaves room for air to flow in the raspberry pi.
Also, the legs are probably too small to handle the weights those. I need to make them bigger.
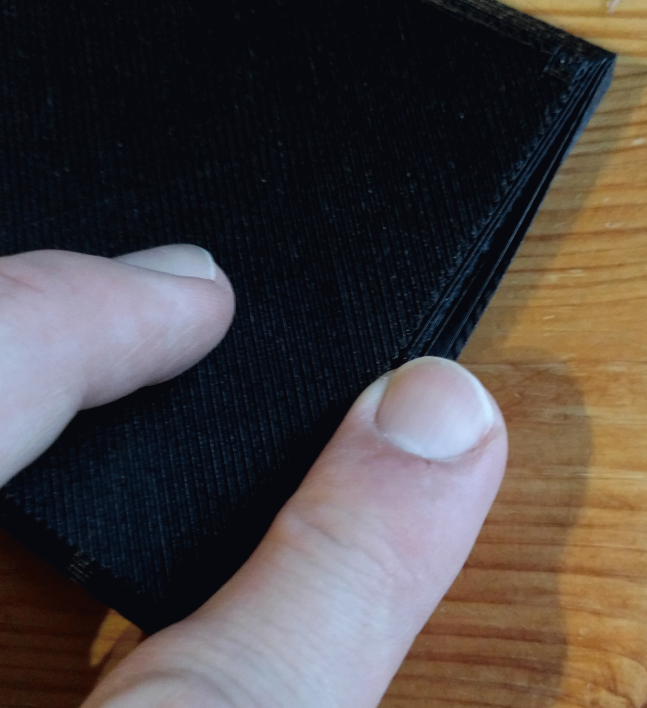
Like the triangle attempt, I still have the wall not stuck to the infill.
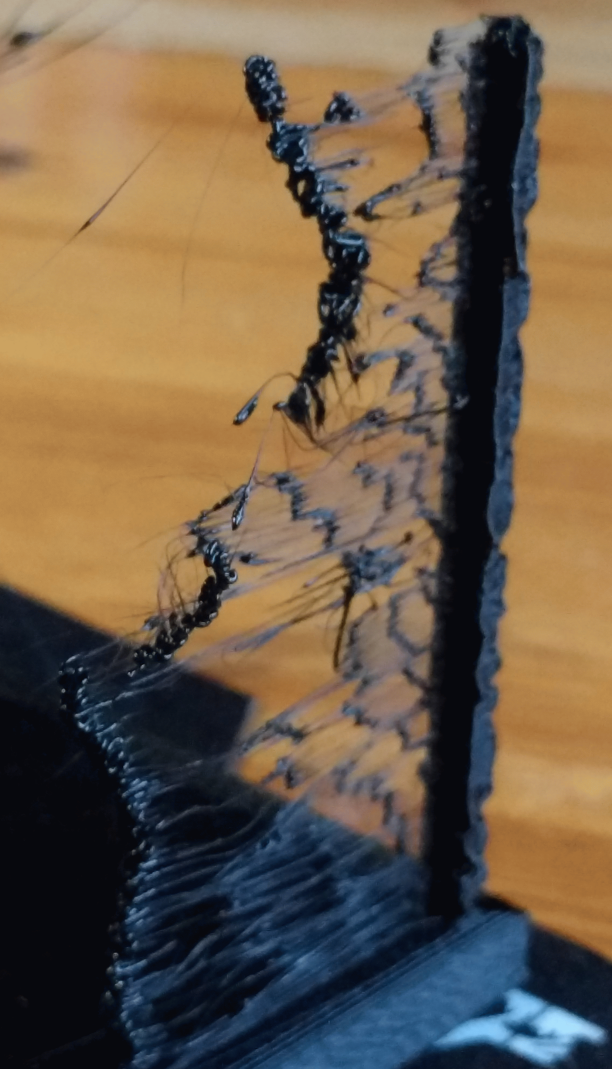
third attempt: increasing retraction to 5mm (instead of 2mm) and cleaning the bed
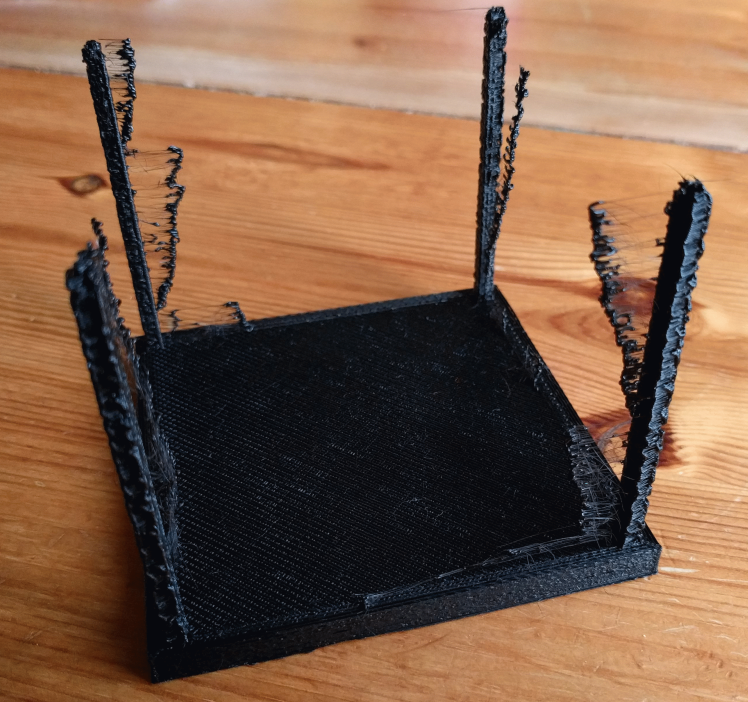
Way less stringing, but still some.
what I learned/realized
Printing in FDM a leg in vertical is not a good idea. I’d better print the support and the legs separately and them glue them together.
Doing so, I can focus on making the legs stronger by playing on the shapes.
Also, I need to add a rim on the support to make it prevent upper tables to fall.
Also, I realized that the default settings of slic3r are nozzle=0.5mm and filament=3mm, while I have a 0.4mm nozzle and 1.75mm filament.
fourth attempt: print only the legs, and set nozzle size to 0.4 instead of 0.5 and correct filament diameter (1.75 instead of 3)
Let’s try to print a 1cmx2cmx7cm rectangle horizontally.
The result was perfect. Even with a filament a little bit wet. The infill and the perimeter now touch correctly.
Also, I tried to glue it with UHU max repair extreme and an hot melt glue pen. Both gave pretty good bonds.
what I learned/realized
But, while removing the rack to replace it with the first table, I realized I could rearrange the rack so that I came to the same result with it.
Therefore, I stopped this project and used the printed legs to create feet for my hard drives, so that I can arrange them vertically.
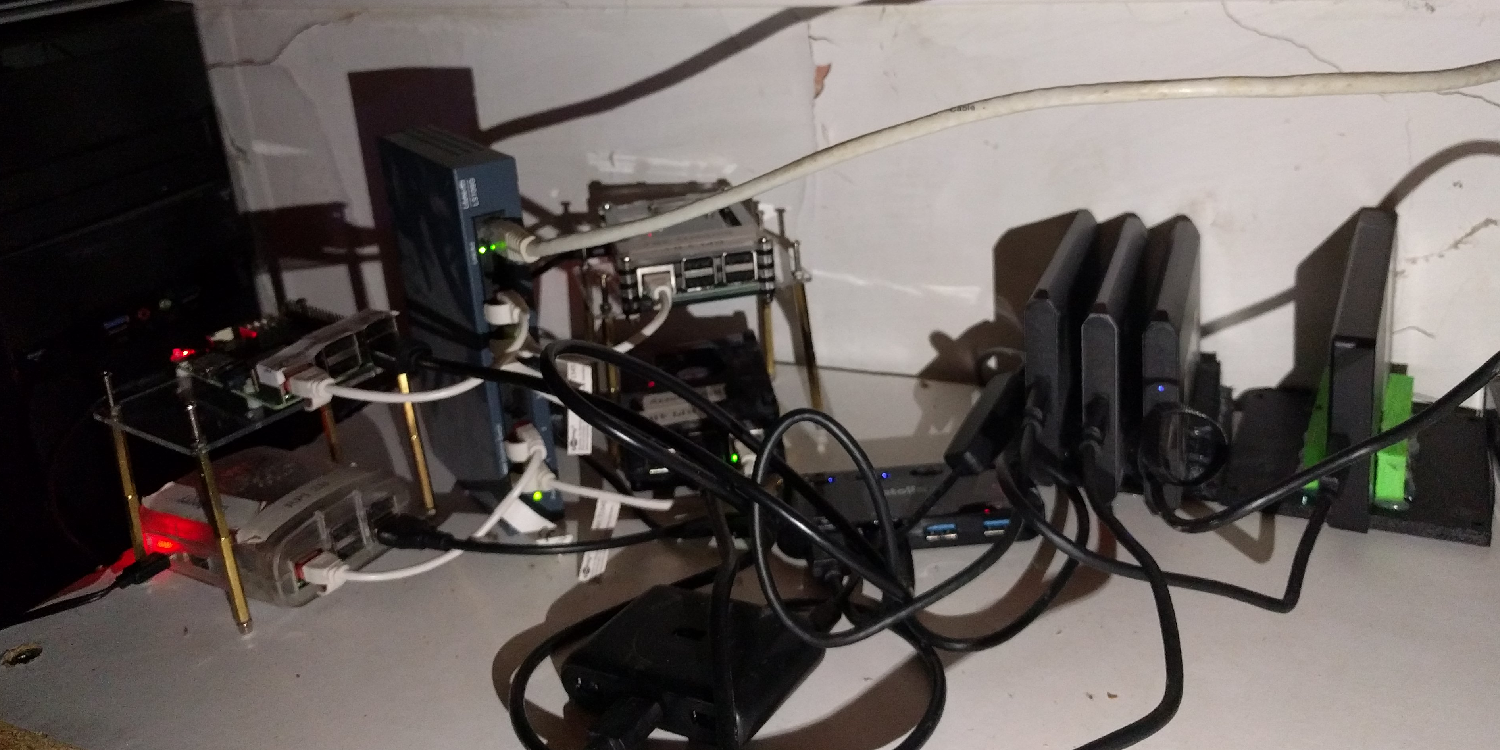
On the left, the raspberry pi in the rack built as simple tables. On the right, the hard drives standing on feet made of the table I printed.